

RTAWD Differential Rebuilds Part # 2
Posted by AKDBuilt Performance on Dec 19th 2020
- 3/8ths” Drive Ratchet.
- 3/8ths” Drive 3″ extension.
- 3/8ths” 8mm 6pt Socket.
- 1/2″ Drive Ratchet or Breaker Bar.
- 1/2″ Drive 24mm or 34mm Socket.
- 1/4″ Drive Ratchet.
- 1/4″ Drive 6mm Socket.
- 1/4″ Drive 3″ Extension.
- Driveshaft Flange Support Bar.
- 6″ Long #3 Strait Blade Screw Driver.
- A Hammer.
- Small Center Punch.
- 6″ Pry-bar.
- Small Razor for Gasket removal.
- Drip Pan.
- Gloves.
- 45 Degree Scribe.
-
RT-AWD Dual Pump Assemblies -
Part 2 CRV Differential Disassembly!
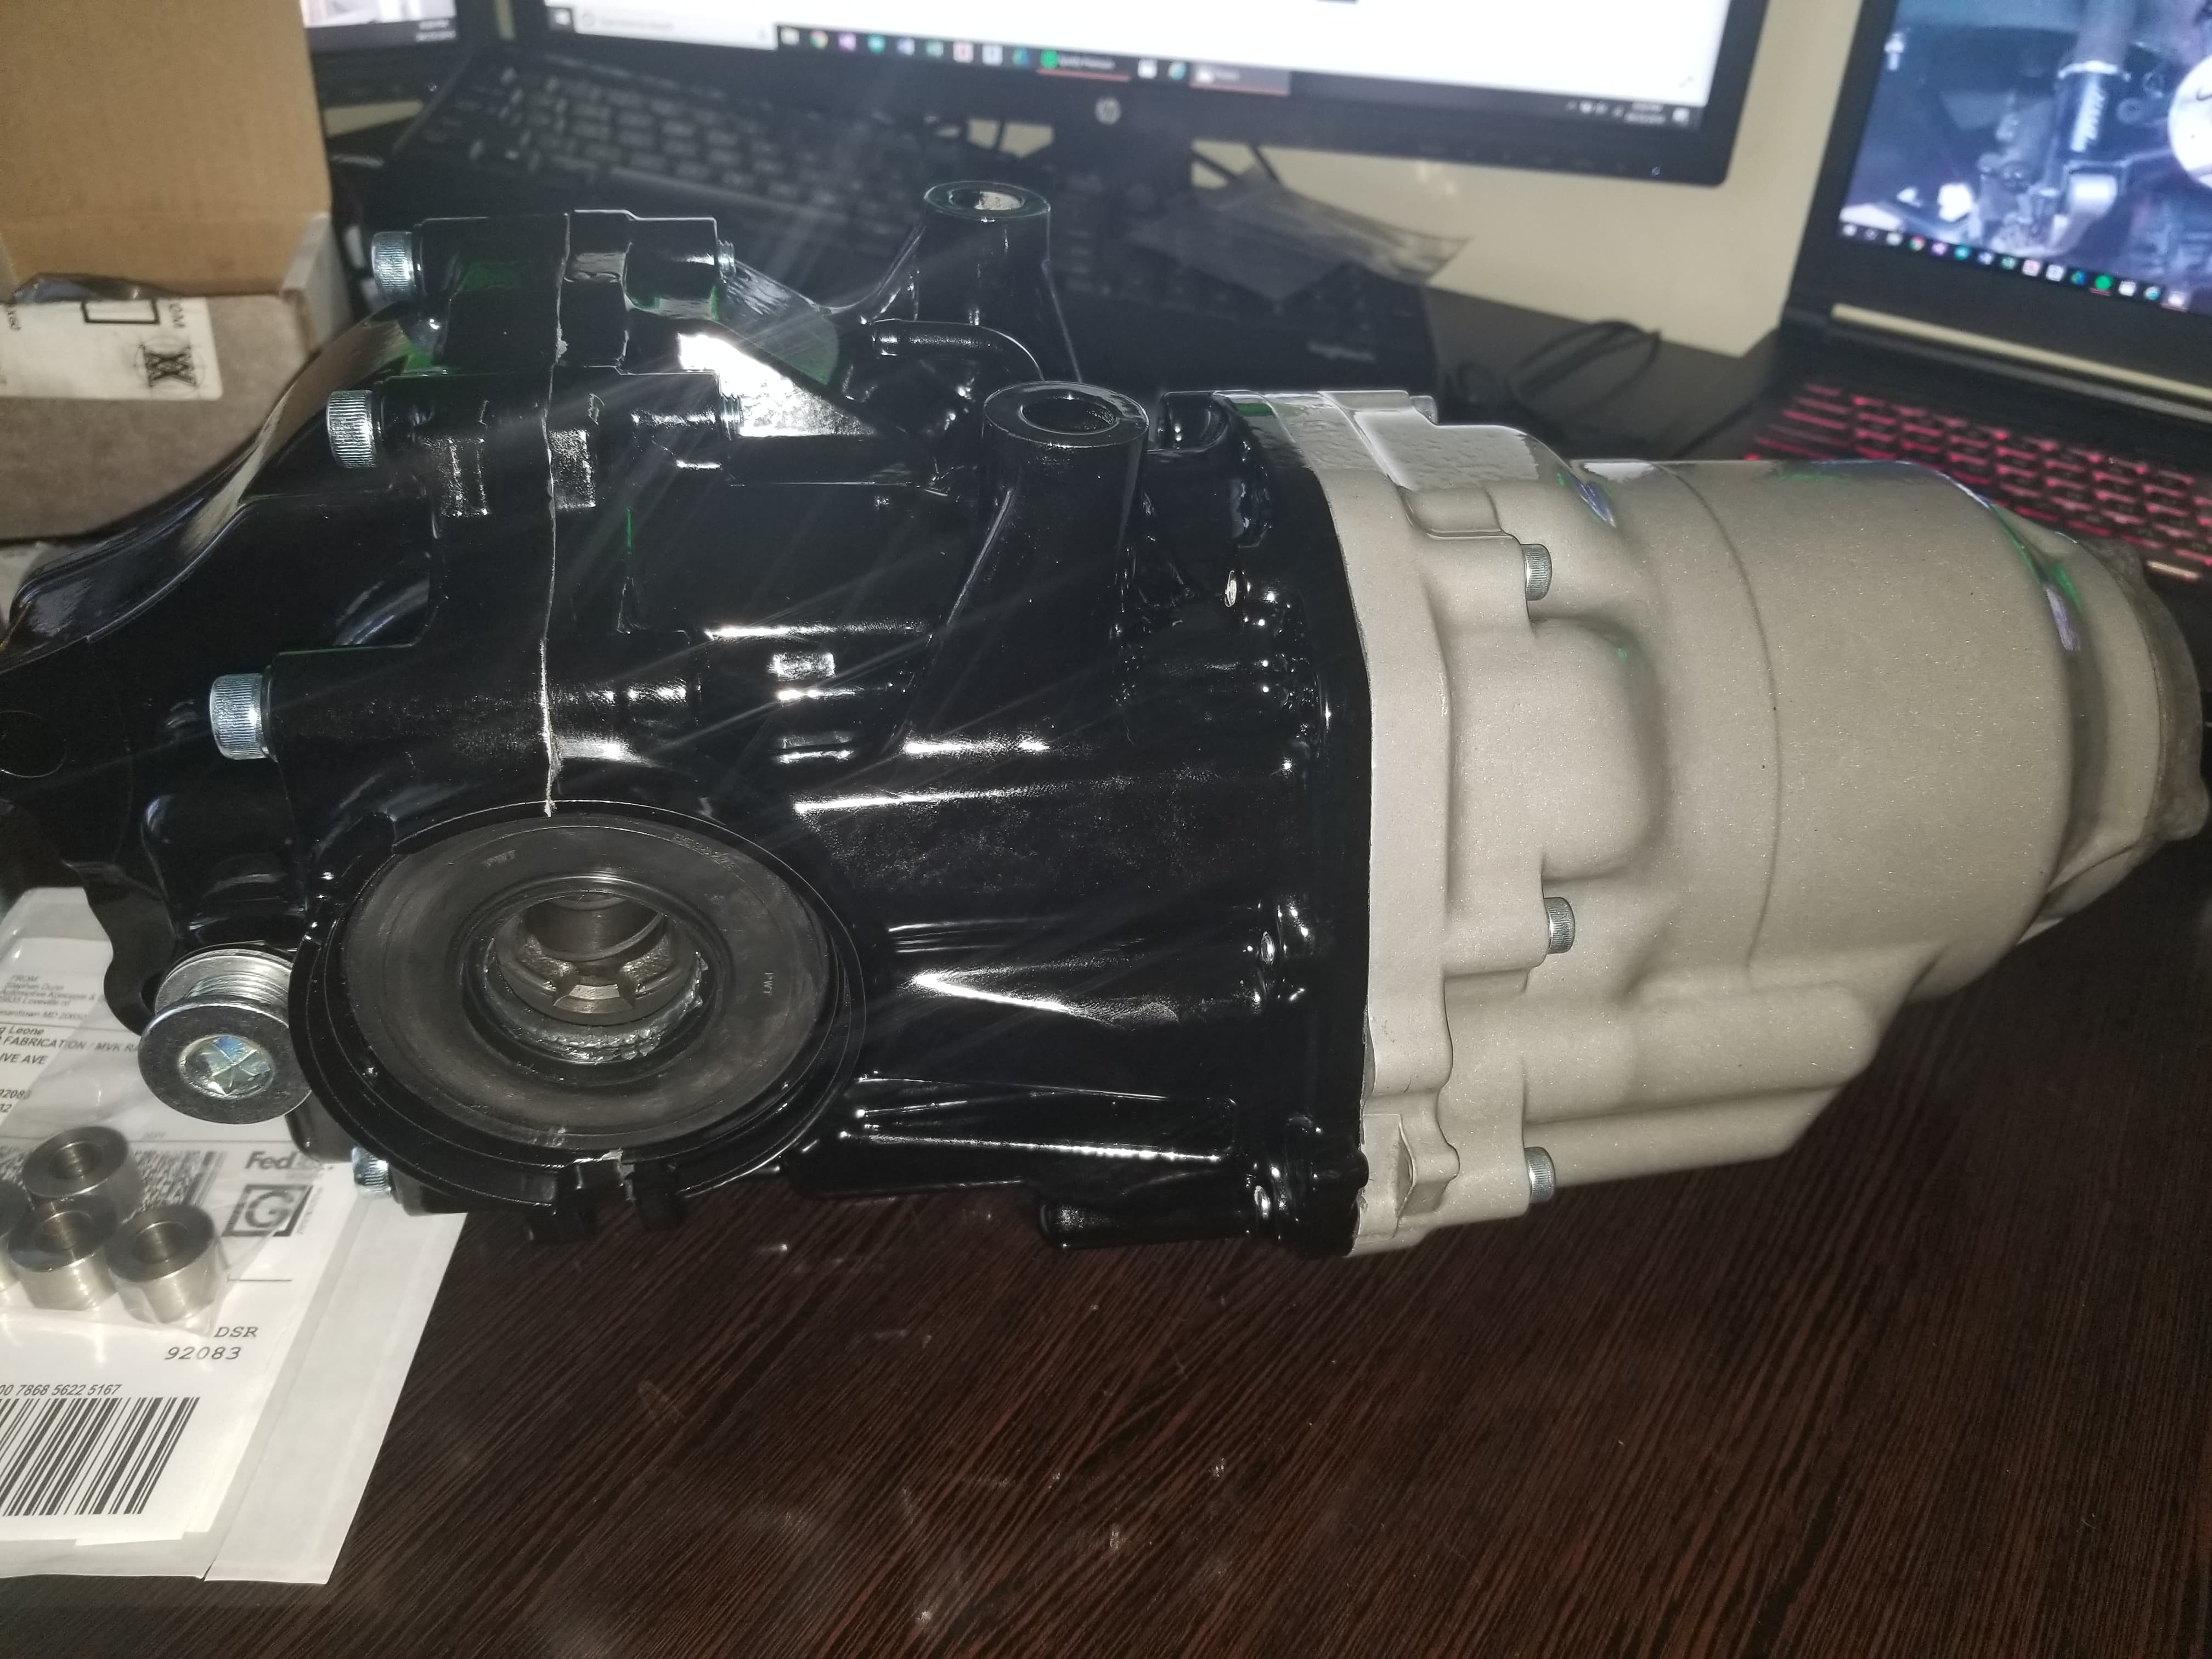
Continuing from our last post where we disassembled the rear differential from the carrier and talked about what we will be installing into our customers differential. Today we will be removing the nose cap from the differential carrier, the clutch assembly, and the dual pump assembly for the Dual Pump Quick Spool Mod and Racing Diffs Clutch Upgrade Install! So without further adieu Lets Get it!
To begin this process we will need to get some tools like last time to prepare for our disassembly! I’d recommend a “Strait Blade Screw Driver” always at the ready! But here are the tools that will be required to accomplish this task!
Required Tools
Differential Nose Cap Removal
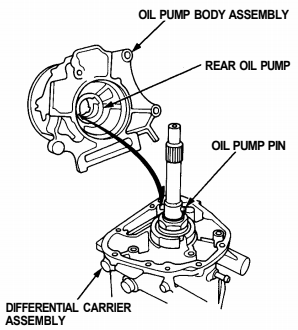
First I needed to get some illustrations from the CRV Master Service Manual. I acquired them from Honda thanks to a couple of good friends! This should help support this episode for you all to follow along. The procedure is pretty strait forward. Using a center punch you will need to take your hammer and remove the dimple on the pinion nut that locks the differential pinion nut. This dimple keeps the pinion nut from backing off and from loosening under normal driving conditions.
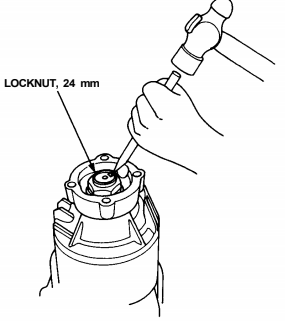
Hammer and Center Punch Pinion Dimple Removal Procedure.
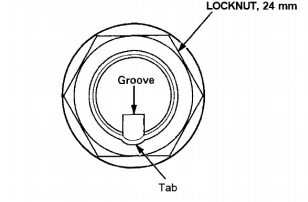
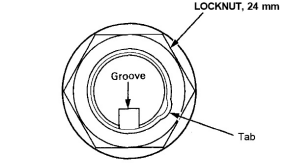
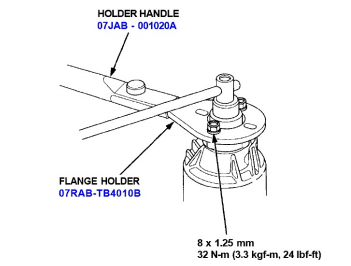
While supporting the weight of the differential install the driveshaft flange support bar and hardware onto the U joint flange of the differential. Install the driveshaft flange support bar onto the differential and grab your 1/2″ drive breaker bar and (24mm or 34mm) socket. Place the socket into the differential and break the TQ of the 24mm pinion nut and remove it.
Next we will remove the 8x8mm bolts from the differential nose cap cover. Pay particular attention to not strip the bolts when removing them. Using your 3/8ths” drive ratchet, 3/8ths” drive 3″ extension, and 3/8ths” Drive 8mm 6pt socket remove all 8 bolts from the differential nose cap cover and place them in a safe area.
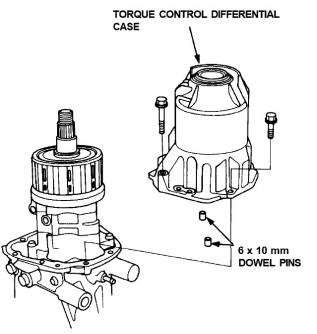
Once this step is complete use your 6″ strait blade screw driver and pry-bar to separate the nose cap cover from the differential by prying at the separation tabs on the nose cap and carrier assembly. Remove the nose cap cover over your drain pan to alleviate spills and messes. Separate the nose cap cover from the differential carrier assembly and place in a safe location. This should expose the differential TCD and Dual Pump Assembly.

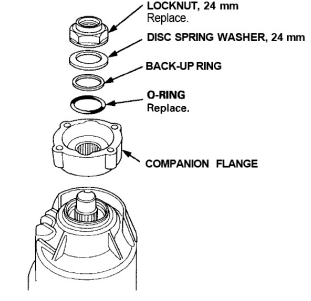
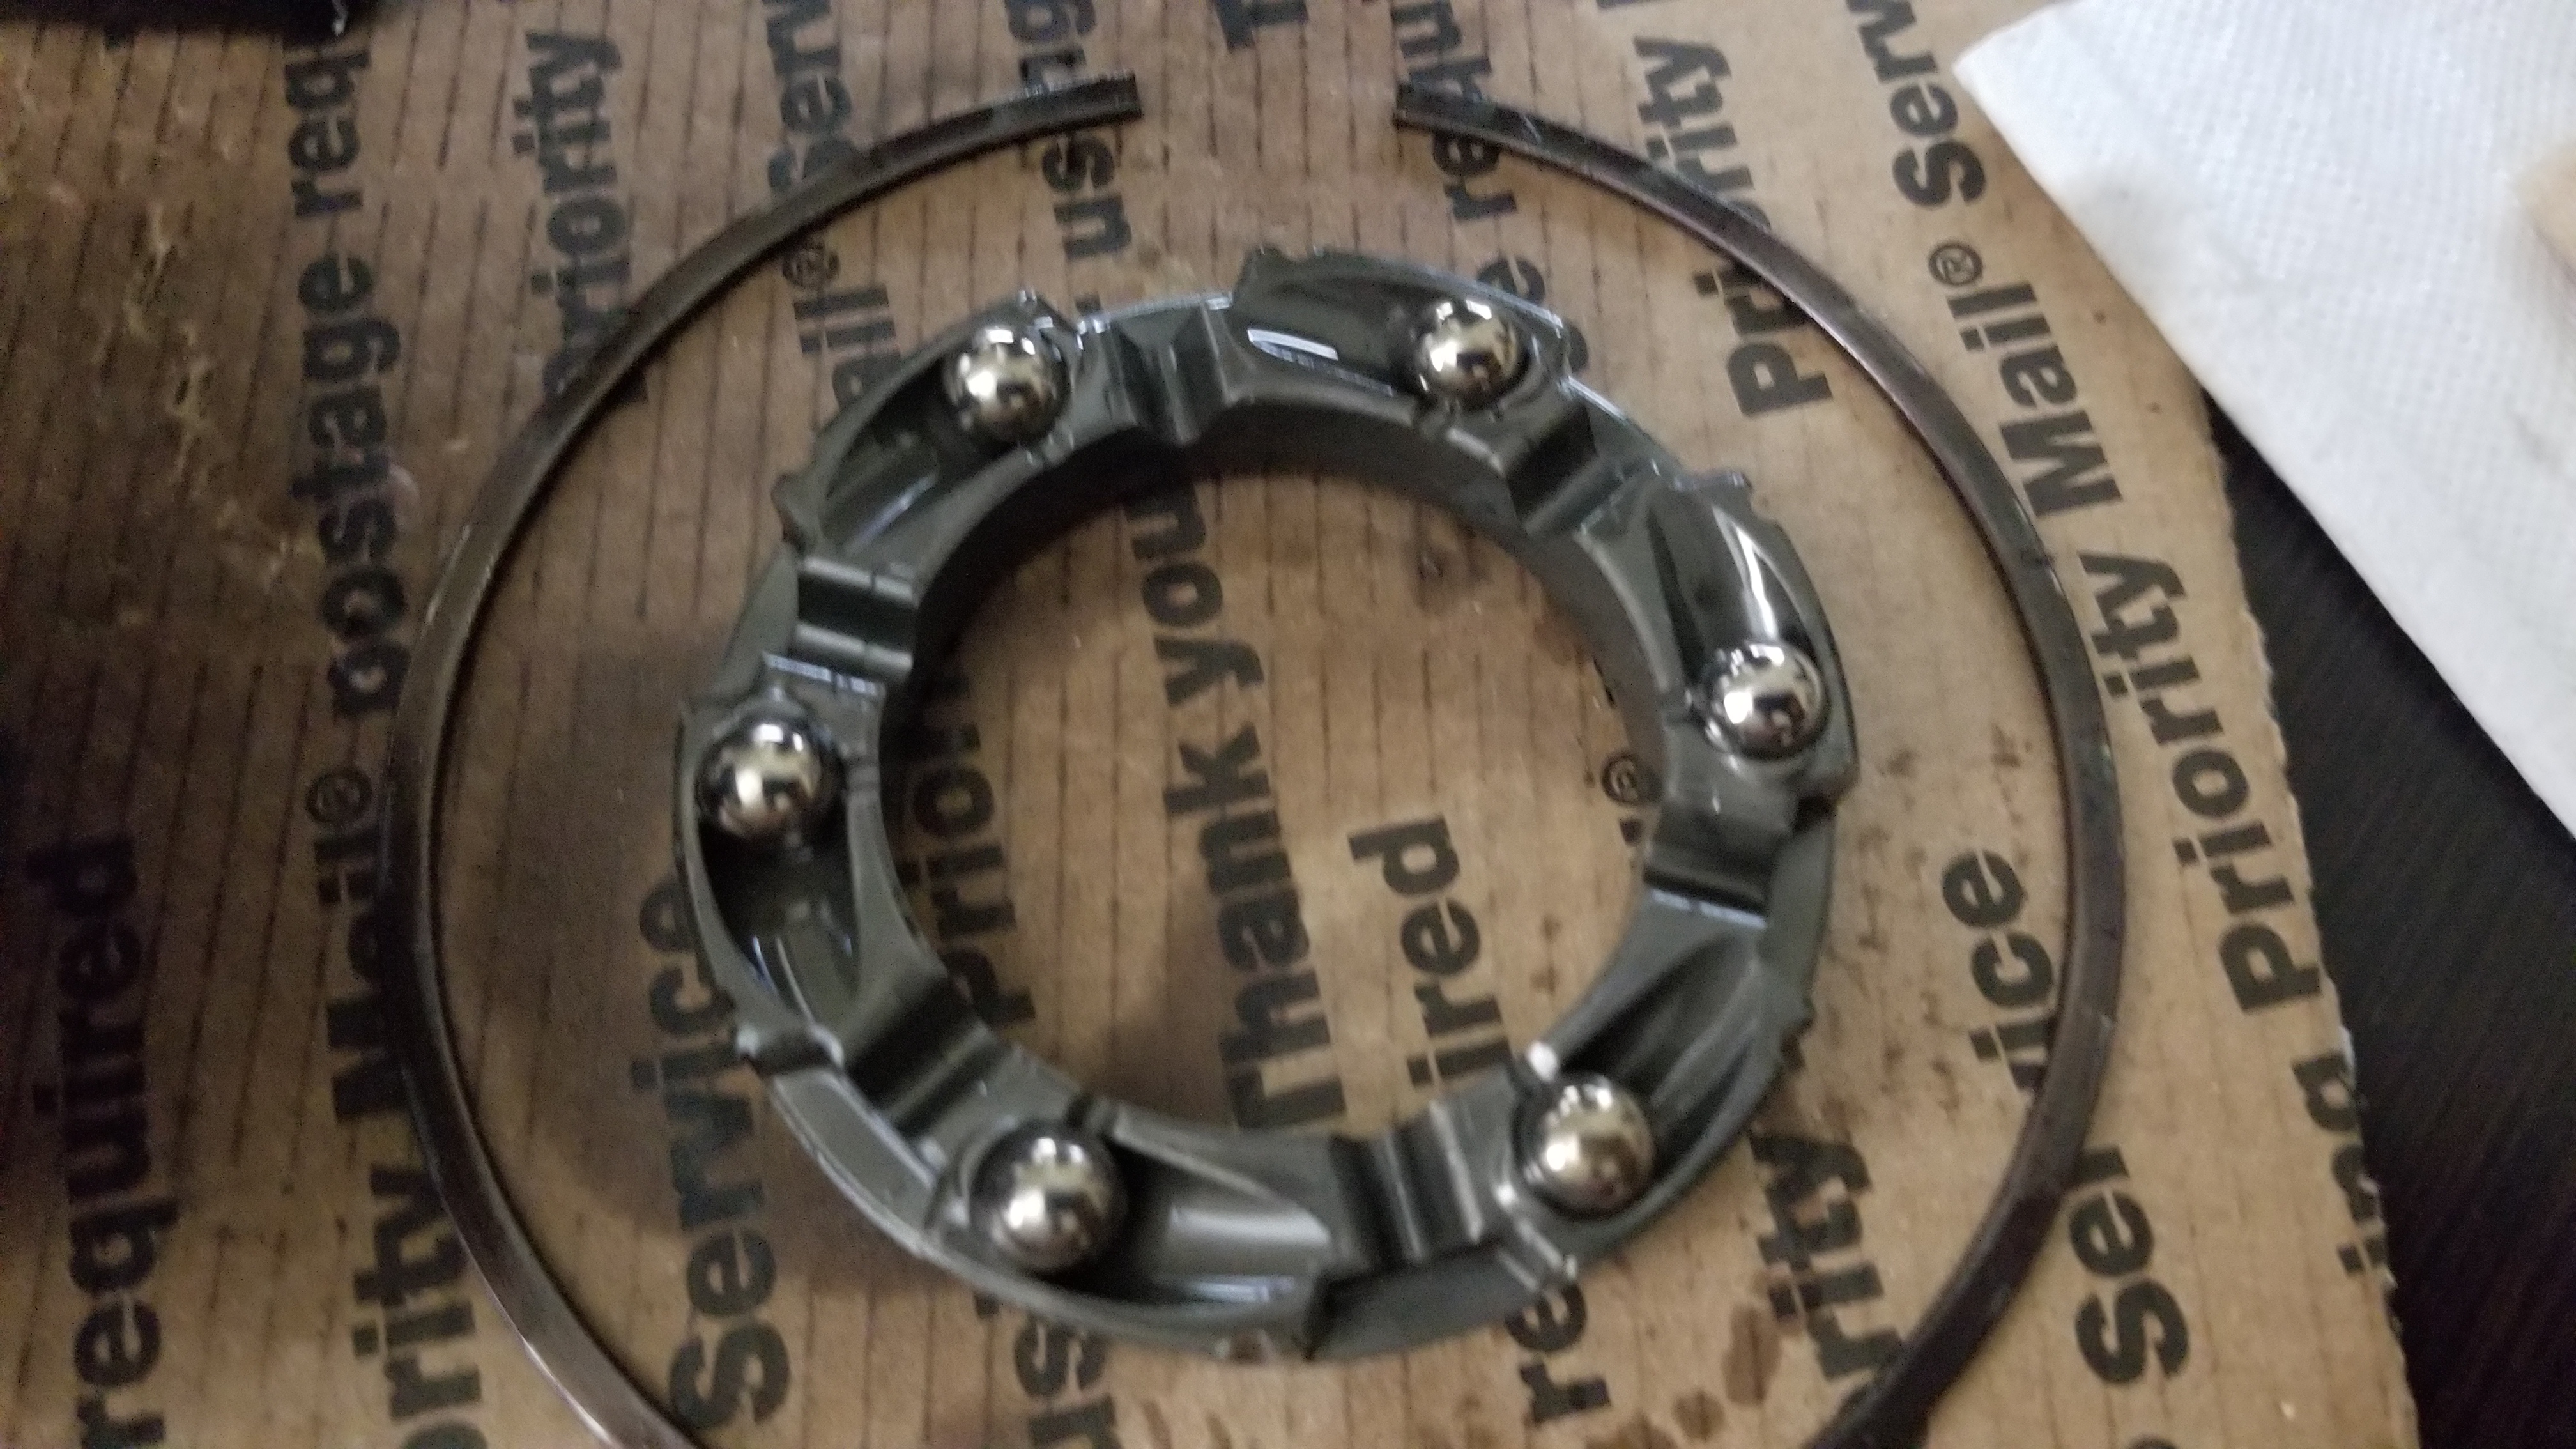
Remove the differential clutch assembly and clutch cage by lifting them from the pinion shaft and placing them to the side. Warning! The TCD Clutch RAMP Assembly for the 2006 – 2011 RT-AWD differential have 8 small ball bearings that ride under the clutch assembly. Use caution when removing. Any damage to these ball bearings will render the TCD clutch RAMP assembly non-operational.
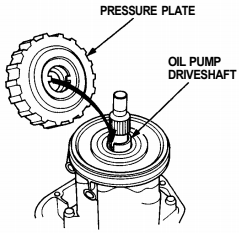
Dual Pump Assembly Removal!
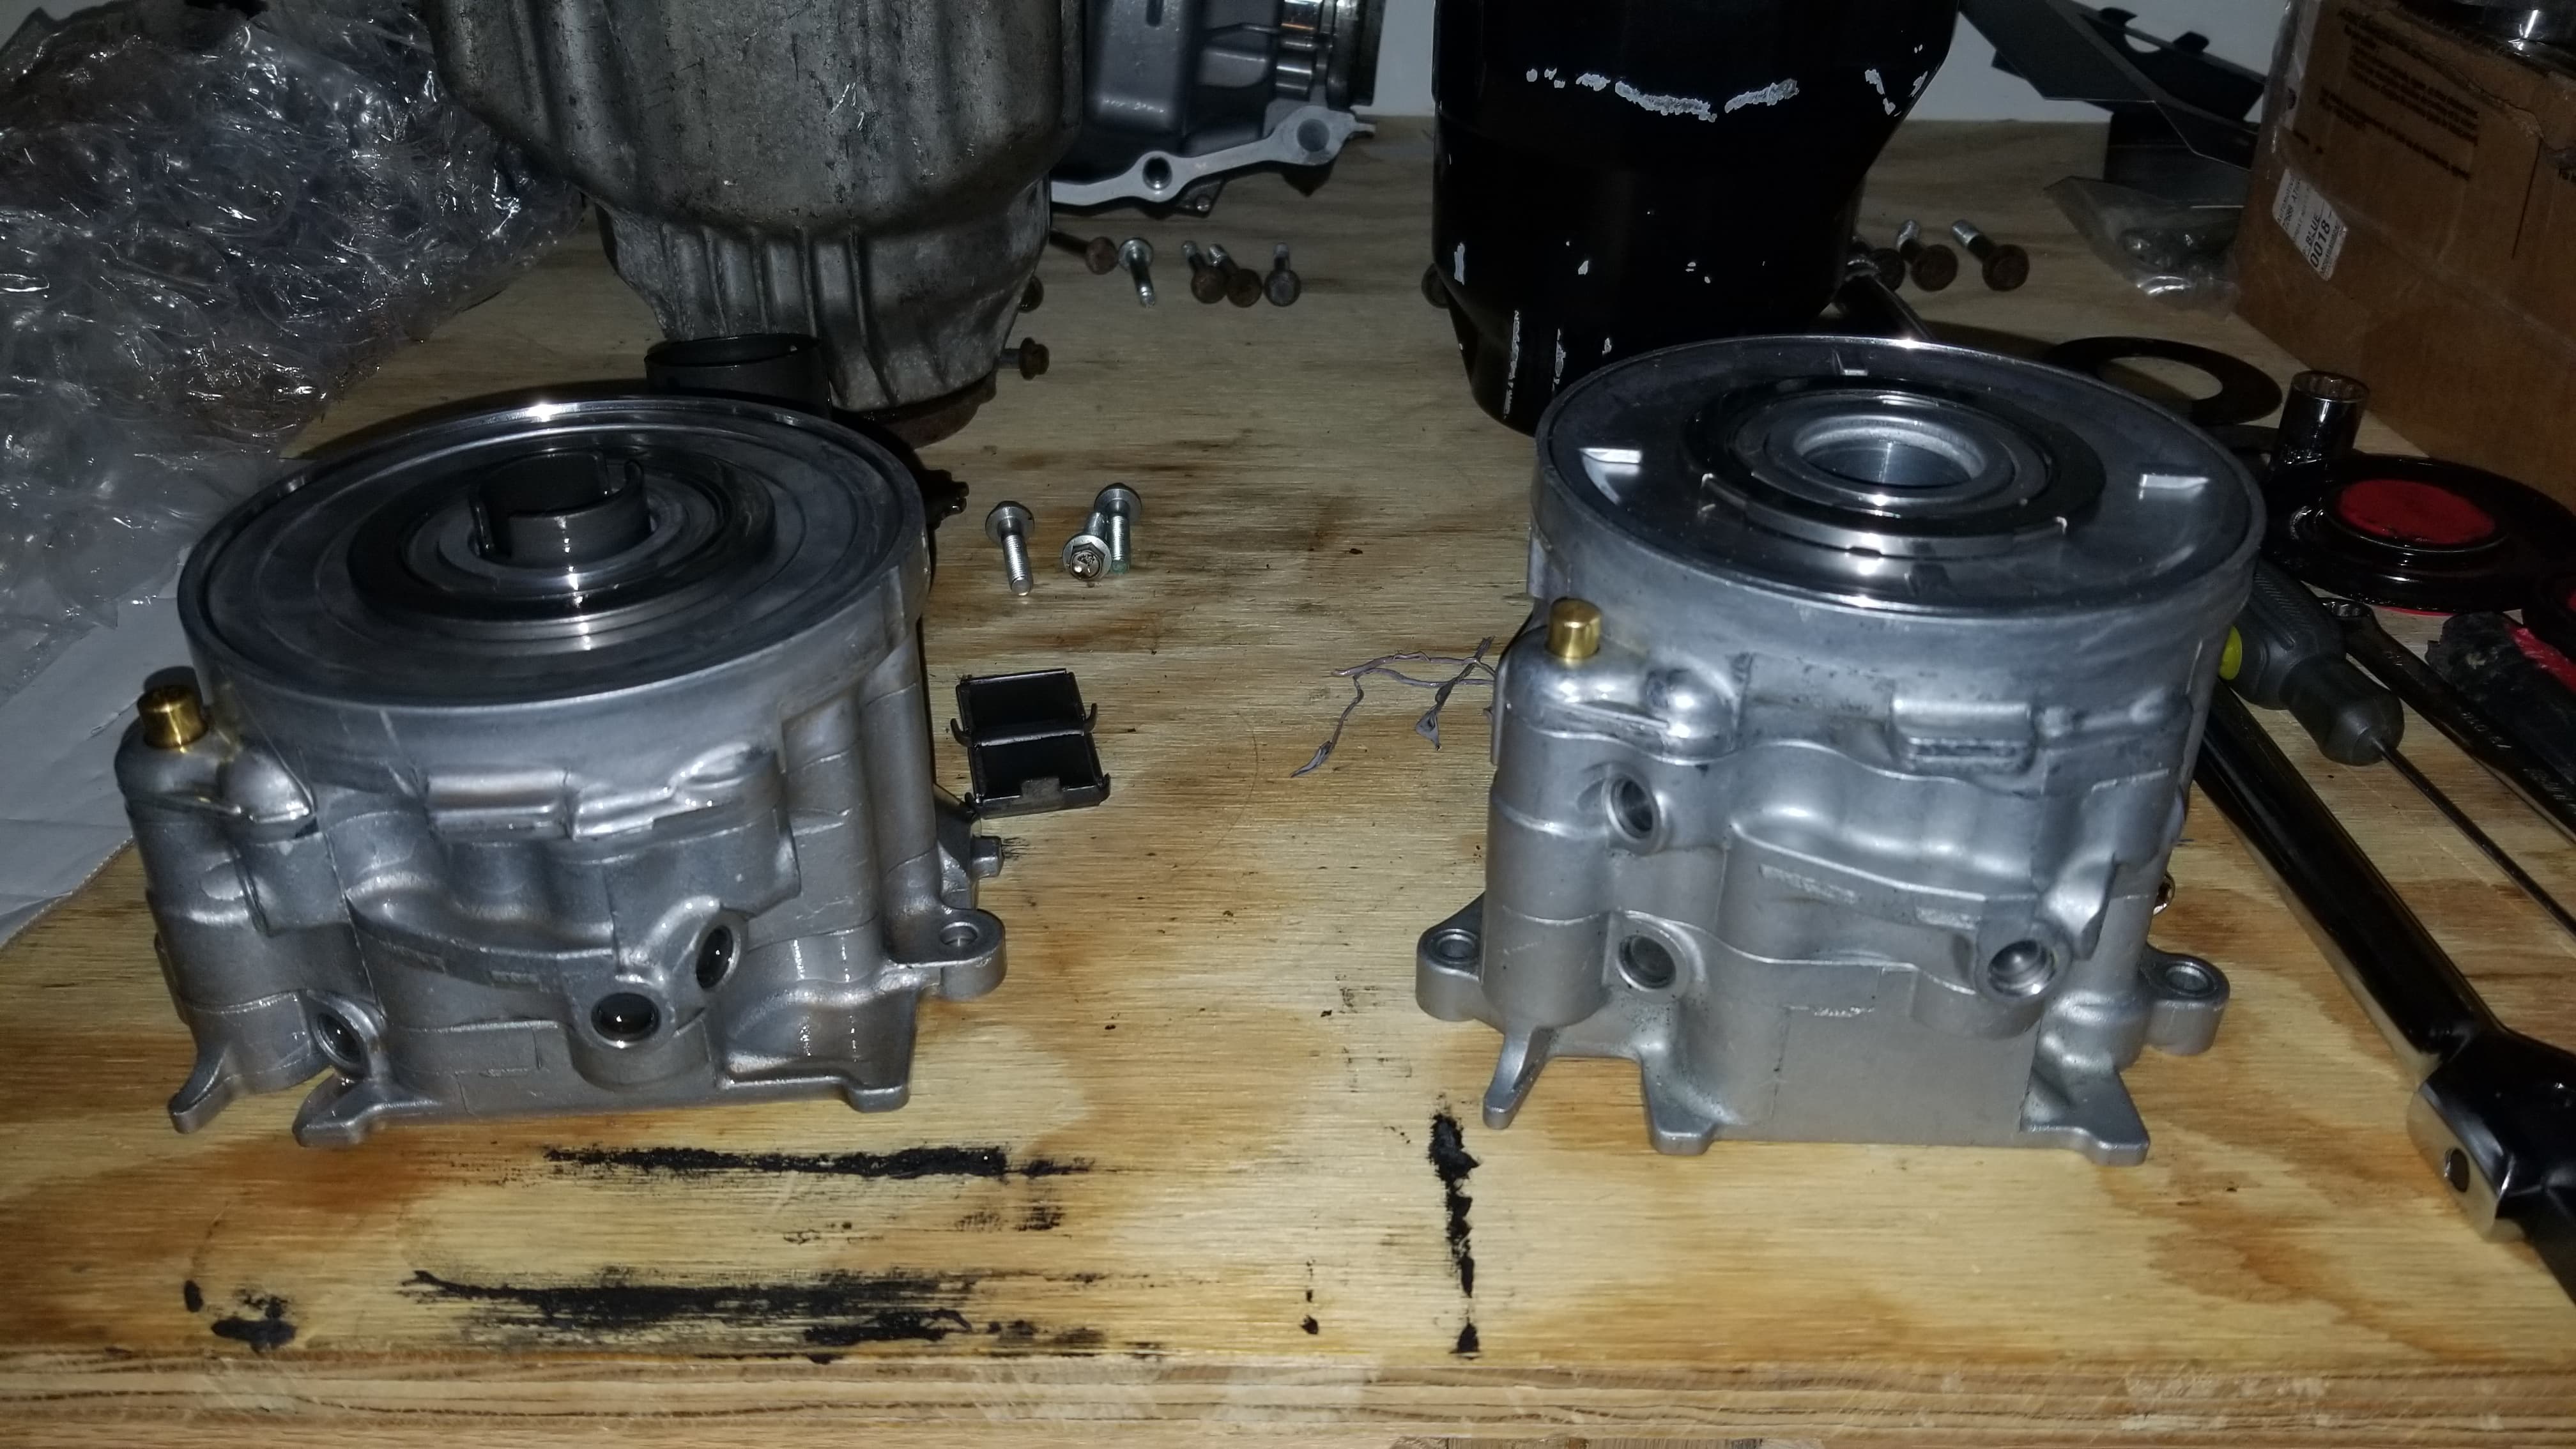
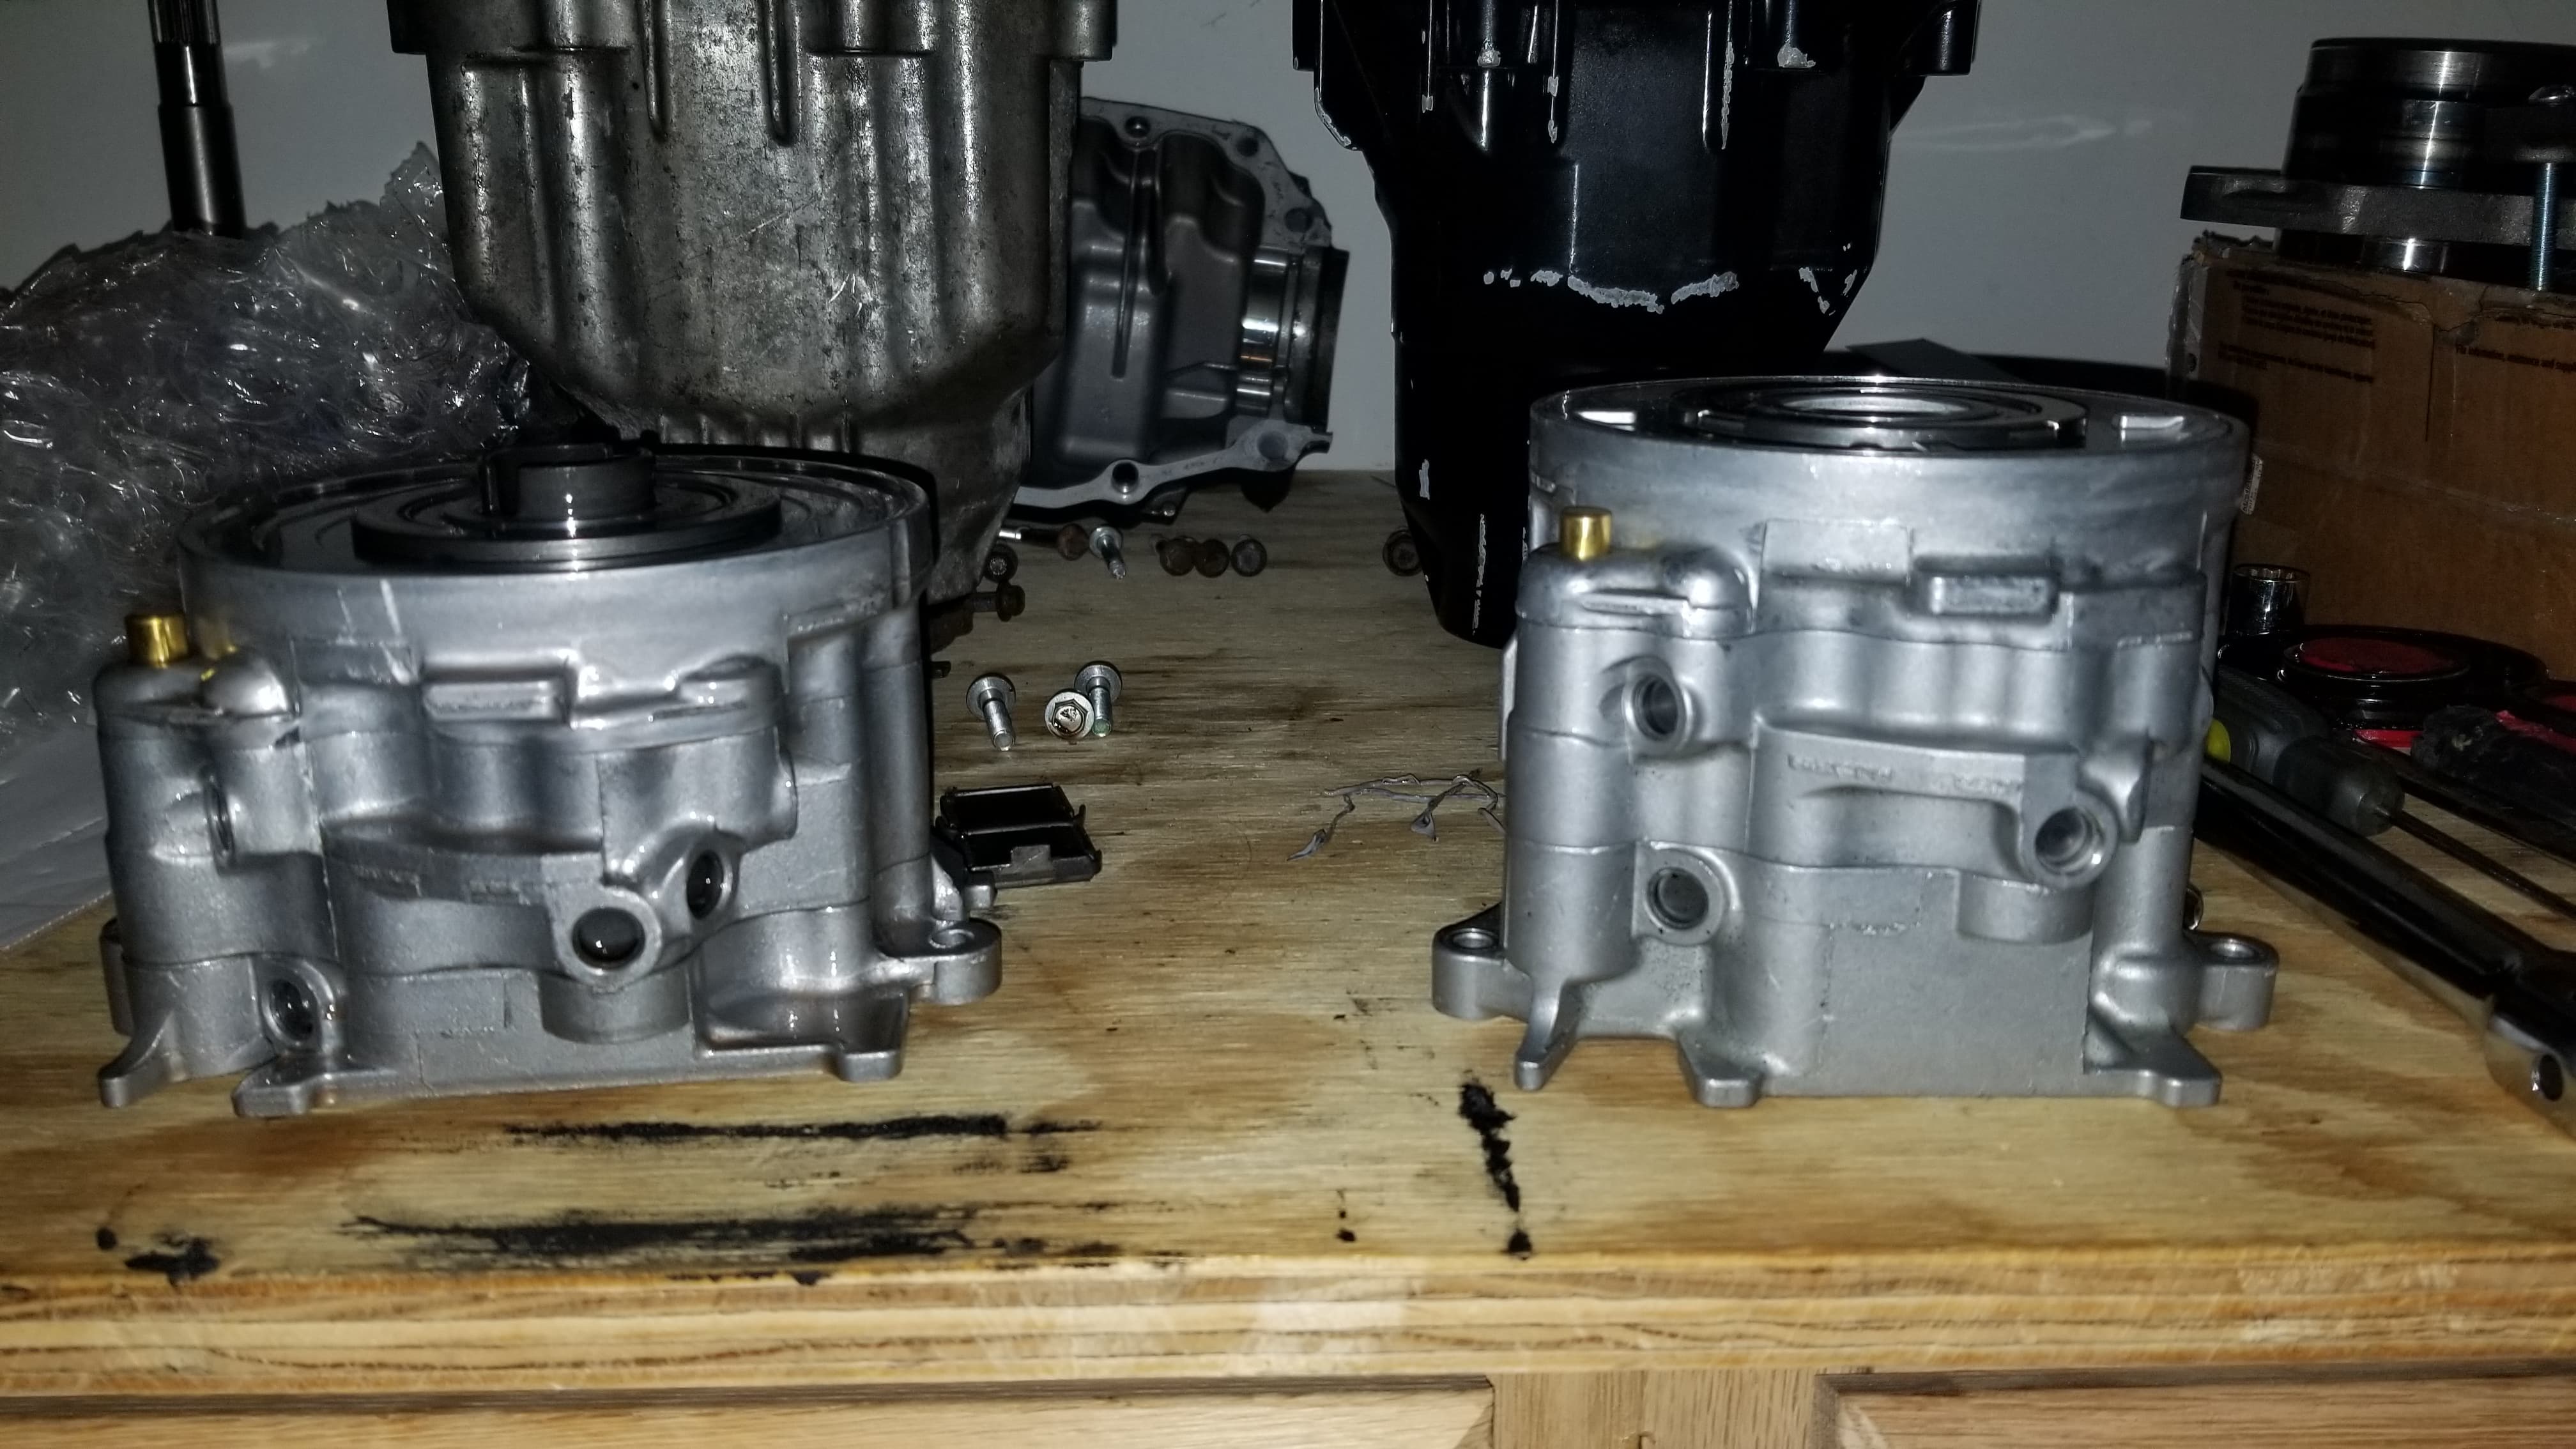
I think it’s important to give some characteristics of both differential dual pump assemblies we support! At first glance the dual pump assemblies from the 1997-2005 CRV are noticeably different in size.
Carrier Assembly Preparation!
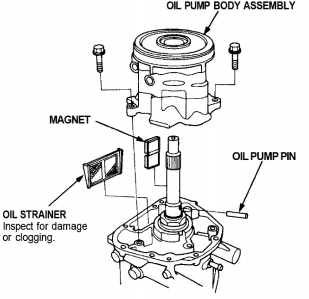
Using your strait blade screw driver use the side of the case to gain leverage to pry the strainer from the carrier assembly. *CAUTION! Please be careful not to damage the screen of the strainer during removal.
In the next part of this build documentary we will perform the inspection of the internal differential components We will then compare the older CRV differential carrier assembly to the new and remove the pinion from the differential for bearing inspection. Stay tuned and we will be back soon! Thanks for following!
Like!/ Share!/ Comment!